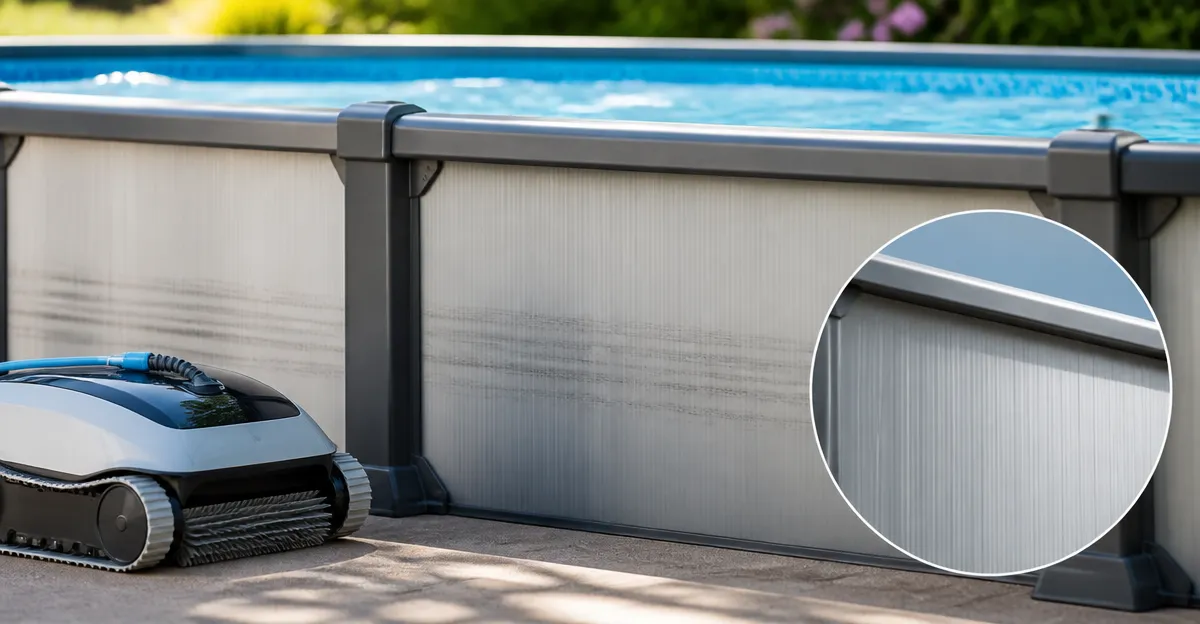
How to Prevent Robotic Pool Cleaner Scuff Marks on Metal Above‑Ground Pool Walls
Introduction
Robotic pool cleaners offer convenience, but their wheels can leave unsightly scuff marks on the metal walls of above‑ground pools. These marks not only diminish the visual appeal of the pool but also accelerate liner wear, leading to costly repairs. This guide explains how to protect metal walls using proven techniques and recommended products, ensuring a smooth surface that resists scuffs while maintaining optimal pool performance. By following the steps, one will learn to prepare the wall, install protective foam, and maintain the system for long‑term durability.
What You’ll Need
- Clean cloths and mild detergent
- Utility knife or scissors
- Foam adhesive spray (optional, for wall foam)
- Measuring tape
- Protective foam cove – Blue Wave Pool Cove 19-Pack
- Wall foam padding – choose one based on pool size:
- Measuring ruler and marker
- Protective gloves
Step 1: Clean and Inspect the Metal Wall
The first step is to eliminate any dirt, debris, or residue that could interfere with adhesive bonding. Use a mild detergent mixed with water, a soft cloth, and a gentle scrub to wash the entire wall surface from bottom to top. Rinse thoroughly and allow the wall to dry completely; moisture trapped beneath foam can cause adhesion failure. During inspection, note any rust spots or sharp edges that could damage the liner or the foam cove; these should be sanded or treated before proceeding.
Step 2: Install Protective Foam Cove at the Wall‑to‑Floor Junction
The wall‑to‑floor junction is the most vulnerable area because the liner experiences constant flexing. Applying a foam cove creates a smooth transition, preventing the robotic cleaner’s wheels from grinding against metal. For this purpose, the Blue Wave Pool Cove 19-Pack is ideal.
- Why this product? It is a peel‑and‑stick HDPE foam strip designed specifically for above‑ground pools, offering a durable barrier that resists water pressure and maintains shape season after season.
- Key details: 19 strips provide 77 feet of coverage, enough for pools up to 24‑ft round or 16 × 32‑ft oval; each strip measures 49 in L × 2.75 in H; price $48.58; rating 4.5 / 5 from 4,590 reviews.
- Installation: Peel the backing, align the strip with the base of the wall, and press firmly onto a clean, dry surface. Trim excess with scissors for a perfect fit. Overlap adjacent strips slightly to avoid gaps where the cleaner could catch.
Once the cove is in place, the transition from wall to floor becomes a gentle curve, reducing the likelihood of scuff marks and simplifying vacuuming because debris no longer accumulates in sharp creases.
Step 3: Apply Wall Foam Padding for Full‑Height Protection
While the cove safeguards the bottom edge, the vertical portion of the wall still requires protection. Wall foam padding creates a continuous cushion that absorbs the robot’s wheel pressure, distributes load evenly, and adds a thermal barrier that reduces heat loss.
Select the appropriate foam based on pool dimensions:
Option A – Blue Wave Pool Wall Foam 48in x 75ft
- Fit: Suitable for pools up to 21‑ft round and 54‑in tall.
- Features: Closed‑cell polyethylene, 1/8‑in thickness, high‑density padding, price $79.99, rating 4.6 / 5 from 1,534 reviews.
- Why choose it? The roll length (75 ft) covers most standard pools, and the brand’s 90‑day warranty provides confidence.
Option B – Blue Wave Pool Wall Foam 48in x 85ft
- Fit: Extends coverage for larger pools up to 24‑ft round.
- Features: Same closed‑cell construction, price $80.99, rating 4.6 / 5.
- Why choose it? The additional 10 ft of material reduces the need for splicing, creating a seamless barrier for larger installations.
Option C – Gladon Pool Wall Foam 100ft Roll
- Fit: Universal 48‑in height, 100‑ft length suitable for any above‑ground pool.
- Features: Closed‑cell 0.125‑in foam, price $76.99, rating 4.6 / 5 from 685 reviews.
- Why choose it? The longer roll minimizes seams, and the brand emphasizes easy application.
Option D – SmartLine Wall Foam Kit 100ft
- Fit: 48‑in high, 100‑ft roll with included spray adhesive.
- Features: High‑density closed‑cell padding, adhesive for strong bond, price $134.94, rating 4.4 / 5 from 169 reviews.
- Why choose it? The kit provides both foam and the adhesive, simplifying the process for users who lack a separate spray adhesive.
To install, unroll the foam along the wall, cut to length with a utility knife, and apply using a foam adhesive spray (if not using the SmartLine kit, purchase a compatible spray separately). Overlap each section by at least 2 in and press firmly to ensure a uniform surface. The foam’s closed‑cell structure prevents water absorption, preserving its protective qualities over many seasons.
Step 4: Seal Edges and Finish the Installation
After the foam padding is in place, seal the top and side edges to prevent water infiltration behind the foam, which could cause mold or degrade the liner. Use a waterproof sealant compatible with both HDPE foam and metal, applying a thin bead along seams and the upper edge of the foam. Smooth the sealant with a gloved finger for a clean finish.
Finally, re‑install the pool liner, ensuring it rests evenly on the foam surfaces. The liner should glide over the foam without catching, creating a barrier that protects both the liner and the metal wall from robotic‑induced scuffs.
Tips & Pro Tips
- Test adhesion first: Before committing to full installation, apply a small strip of the foam cove to a hidden area to confirm the peel‑and‑stick backing adheres well to your specific wall material.
- Temperature matters: Install foam when the ambient temperature is between 65°F and 85°F; extreme cold can reduce adhesive tack, while excessive heat may cause premature curing.
- Use a lint‑free cloth: Any dust left on the wall can create bubbles under the foam, leading to premature delamination.
- Regular inspection: After each swimming season, inspect the foam for any lifting edges or tears, and re‑apply adhesive as needed.
- Combine products: For maximum protection, use both the Blue Wave Pool Cove 19-Pack at the base and a wall foam roll that matches your pool size.
Troubleshooting
| Problem | Possible Cause | Solution |
|---|---|---|
| Foam lifts after a few weeks | Surface not completely dry or oily | Re‑clean the wall with isopropyl alcohol, allow to dry, and re‑apply foam. |
| Scuff marks persist despite foam | Robot wheels are too aggressive or misaligned | Adjust wheel pressure settings on the robot; consider adding a thin layer of pool‑safe silicone over the foam. |
| Heat loss increases | Foam not covering entire wall height | Install additional foam strips to achieve full coverage; ensure seams overlap. |
Conclusion
Protecting metal above‑ground pool walls from robotic scuff marks requires a systematic approach: clean the surface, install a protective foam cove, apply full‑height wall foam padding, seal edges, and maintain the system. By selecting the appropriate products—such as the Blue Wave Pool Cove 19-Pack and a compatible wall foam roll—one can extend liner life, improve pool aesthetics, and reduce heating costs. Implement these steps, and the pool will remain pristine season after season.
Products Mentioned in This Guide
Frequently Asked Questions
What causes robotic pool cleaners to leave scuff marks on metal above‑ground pool walls?
The wheels or tracks of the cleaner rub against the metal, especially when the wall surface is dry or the cleaner’s speed is too high.
How can I prepare the pool wall before installing protective foam?
Clean the wall with a mild detergent and a soft cloth, then dry it completely to ensure the foam adheres properly.
Is adhesive spray necessary for attaching the protective foam cove?
Adhesive spray improves bonding on smooth metal, but many foam cove kits are designed to stay in place with friction alone.
How often should I inspect and replace the wall foam padding?
Check the padding every 3‑4 months for wear; replace it when the foam becomes compressed or shows visible damage.
Can I use any foam padding, or should I choose a specific product?
Choose a foam designed for pool walls, such as the Blue Wave Pool Cove 19‑Pack, which resists water, UV, and abrasion.