How to Replace the Battery in a Cordless Pool Cleaner: Step‑by‑Step DIY Guide for Safe, Long‑Lasting Power
Introduction
This guide explains how to replace the battery in a cordless pool cleaner with confidence and precision. Readers will learn the required tools, safety precautions, and the exact sequence of actions needed to restore full runtime. Understanding the process is valuable because a fresh battery extends cleaning cycles, reduces downtime, and protects the robot from premature failure.
The instructions apply to popular models such as the WYBOT B1 Cordless Pool Vacuum, the WYBOT C1 Cordless Pool Vacuum, and other comparable units. While the exact battery shape may vary, the fundamental steps remain consistent across brands.
By following this manual, a pool owner can avoid costly service calls, maintain warranty compliance, and enjoy uninterrupted pool maintenance throughout the swimming season.
What You'll Need
- Replacement battery compatible with your cleaner model (see product recommendations below).
- Phillips‑head screwdriver set – minimum 3 mm and 4 mm.
- Non‑conductive pry tool or plastic spudger.
- Soft lint‑free cloth for cleaning contacts.
- Protective gloves and safety glasses.
- Multimeter (optional) to verify voltage before installation.
All recommended tools are available on Amazon and are selected for durability and ergonomic design.
Step 1 – Prepare a Safe Working Area
Begin by removing the pool cleaner from the water and placing it on a dry, non‑slippery surface such as a workbench or a sturdy table. Ensure the area is well‑ventilated and free of conductive materials. Put on protective gloves and safety glasses to prevent accidental short‑circuits or exposure to battery chemicals.
For models that feature a quick‑release latch, disengage the latch according to the user manual before proceeding. This prevents the robot from shifting while you work on the battery compartment.
Why this matters: A stable environment reduces the risk of dropping delicate components, which could void the manufacturer's warranty.
Step 2 – Disconnect the Power Source
Locate the power button and press it to ensure the unit is completely powered off. If the cleaner displays a low‑battery indicator, allow it to discharge fully before removing the old battery; this minimizes the chance of residual charge causing a spark.
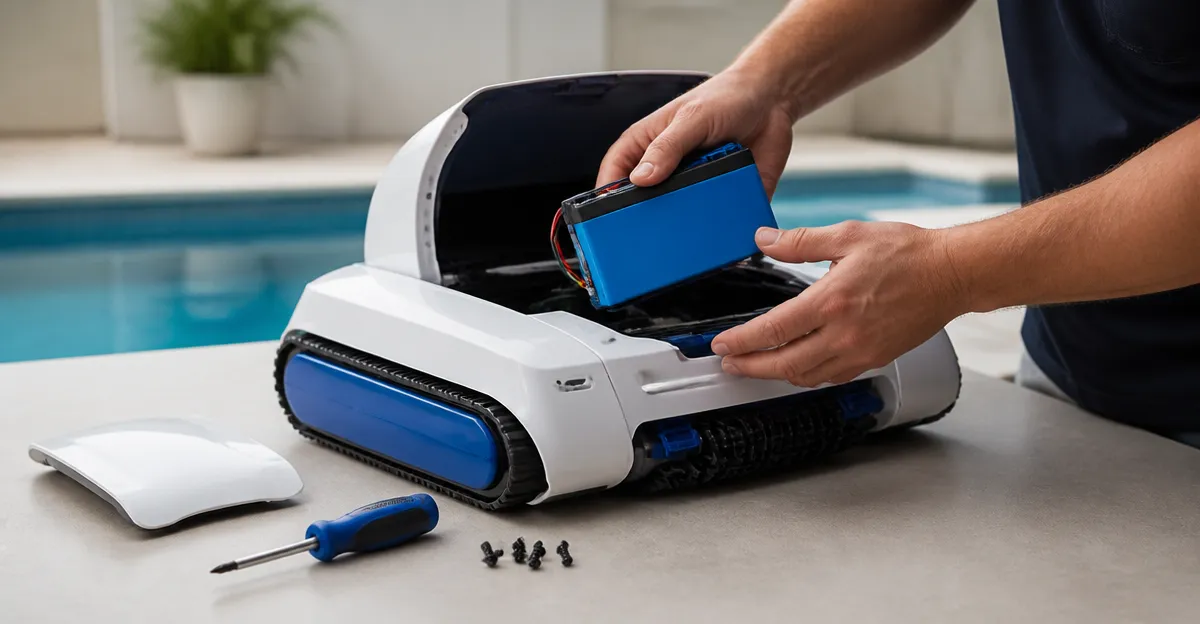
Some models, such as the WYBOT B1 Cordless Pool Vacuum, incorporate a sealed battery compartment that requires a screwdriver to open. Unscrew the two retaining screws using the appropriate Phillips tip.
Why this matters: Disconnecting power eliminates accidental activation of the motor while the battery is exposed.
Step 3 – Remove the Old Battery
Using a plastic spudger, gently pry the battery housing away from the internal contacts. Avoid metal tools because they can short the terminals. Once the housing is loose, lift the battery out by its handles, if present, and set it aside for proper recycling.
Inspect the battery compartment for debris, corrosion, or damaged contacts. Clean any residue with a lint‑free cloth lightly dampened with isopropyl alcohol. Allow the compartment to dry completely before installing the new battery.
Why this matters: A clean compartment ensures optimal electrical connection and prolongs the lifespan of the replacement battery.
Step 4 – Install the Replacement Battery
Select a battery that matches the voltage and capacity specifications of the original unit. The WYBOT B1 Cordless Pool Vacuum uses a high‑capacity lithium‑ion pack rated for up to 125 minutes of runtime; a comparable replacement is included in the official replacement kit sold by the manufacturer.
Align the battery contacts with the internal terminals, ensuring the polarity markings (+ and –) correspond correctly. Gently press the battery into place until the housing snaps shut. Re‑insert the retaining screws and tighten them securely, but do not over‑tighten, as this could crack the plastic housing.
Why this matters: Correct polarity prevents damage to the motor and control board, while a secure fit avoids intermittent power loss during operation.
Step 5 – Verify Installation
If a multimeter is available, measure the voltage across the battery terminals to confirm it reads within the expected range (typically 12‑14 V for most pool robots). A reading significantly lower than expected indicates a defective replacement or poor connection.
Re‑attach any external covers or protective seals that were removed in Step 2. Power on the cleaner and observe the LED indicator; a steady green light usually signals a successful battery connection.
Why this matters: Early verification saves time by catching installation errors before the robot is placed back in the pool.
Step 6 – Test the Cleaner in Water
Place the robot back into the pool and activate a short cleaning cycle, such as the Quick Clean mode available on many models. Monitor the robot for any abnormal noises, erratic movement, or premature shutdown.
For the WYBOT C1 Cordless Pool Vacuum, the app can display real‑time battery status; confirm that the reported runtime aligns with the manufacturer's specifications (120‑160 minutes).
Why this matters: A functional test ensures that the new battery delivers the advertised performance and that the robot’s navigation system remains calibrated.
Tips & Pro Tips
- Always purchase a battery from a reputable vendor; counterfeit cells may lack safety circuitry and can overheat.
- Store spare batteries in a cool, dry place at 40‑60 % relative humidity to preserve capacity.
- When cleaning the contacts, avoid excessive force; a light wipe is sufficient.
- Schedule battery replacement after 300‑400 charge cycles, as capacity naturally diminishes over time.
- Consider using a silicone‑based sealant on the battery housing gasket if the robot will be used in very hot climates; this prevents water ingress.
Troubleshooting
| Problem | Possible Cause | Solution |
|---|---|---|
| Robot does not power on after battery install | Improper polarity or loose connection | Remove the battery, verify correct orientation, and reseat firmly. |
| Runtime is significantly shorter than advertised | Old battery not fully discharged before replacement or a defective new cell | Fully charge the new battery, then run a complete cleaning cycle to calibrate the battery meter. |
| Robot stops mid‑cycle and displays error code | Battery temperature protection triggered | Allow the robot to cool for 10 minutes, then restart. If the issue recurs, replace the battery. |
Conclusion
Replacing the battery in a cordless pool cleaner is a straightforward procedure that can be completed with basic tools and a little attention to safety. By following the six steps outlined above, pool owners can restore full cleaning performance, extend the service life of their robot, and avoid unnecessary service fees. Regular battery maintenance, combined with the recommended pro tips, ensures reliable operation season after season.
Remember that a well‑maintained battery not only improves runtime but also protects the internal electronics from voltage spikes. Should any difficulty arise, refer to the troubleshooting table or consult the manufacturer's support line.
Products Mentioned in This Guide
Frequently Asked Questions
How often should I replace the battery in a cordless pool cleaner?
Replace it every 12‑18 months or after about 200‑250 cleaning cycles, whichever occurs first.
What tools are required for a battery replacement?
Usually just a screwdriver (Phillips or flat‑head) and the replacement battery; no special equipment is needed.
Can I replace the battery myself without voiding the warranty?
Yes, as long as you follow the manufacturer’s instructions and use an approved replacement battery.
How do I safely disconnect the old battery?
Turn off the cleaner, remove any screws covering the battery compartment, then unplug the battery connector before pulling it out.
What signs indicate the battery needs replacement?
Reduced run time, frequent power loss, or the cleaner stopping mid‑cycle are common indicators the battery is failing.